

Repair Bench Basics – Getting Set Up

[December 2014] Repairing gear on the workbench has become a bit of a lost art at many stations. The tools to diagnose and troubleshoot equipment are not always available, nor enough time to do the job properly. In fact, at many stations, the workbench essentially has become little more than a multi-layered storage pile.
Nevertheless, not everything needs to go back to the manufacturer for service. Setting up a good place to do bench repair is not hard. Here, Mike Patton shares some guidelines on how he operates the workbenches at his firm – tips you can use, too.
It might be shocking for some to learn but, in this day and age of surface-mounted, throwaway electronics, finding stations where staff actually fixes gear is not as easy as you would think.
Sometimes this is because IT people are being pressed to handle engineering issues, at other stations, there simply is no engineering department, a contactor may or may not be available to repair broken gear.
At my firm, we still do what many engineers used to do on a routine basis but rarely have the time or opportunity for any more: we actually fix gear. You can do so, too. This is intended to be the first of a series on the basics of what to do when the covers have to come off.
The Bench
First, the basics. The Bench.
Have a large clear area to use as a workbench. Trust me, you really need more space than you might think. As you start to spread out the covers, internal parts, tools, test gear, and repair parts, the workbench can often suddenly disappear under it all! Sometimes it is a fight to get the room, but it is worth the effort.
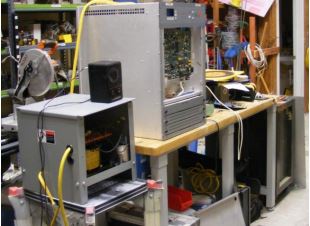
A bench can be overloaded quite quickly
Often when building a workbench, it is wise to think double the area you might at first have thought was needed. A smart move is to include a test gear shelf, with a power strip and, perhaps, audio inputs and output connectors, so these things are easy to access and do not need to take up bench space.
Surround the bench with a hard floor instead of carpet if possible – it will save you much time on your knees trying to find some tiny resistor or washer.
Next, install proper lighting. This is important: you cannot fix what you cannot see. Then get a comfortable chair, preferably one with wheels and adjustable height; you will thank yourself later when you are not having to schedule a visit to the chiropractor.
Know What Should be Inside
Get the proper documentation for any gear you are working on.
Having an accurate service manual for the unit on the bench, especially one with proper parts lists and mechanical drawings as well as schematics and interconnect diagrams, is not only very handy, it can be essential if the problem turns out to be a subtle one.
 If this is the first time you are working on a particular unit, and you are not sure you have the manual that was shipped with the unit, check with the manufacturer – some models have different manuals for different iterations. Do not just grab and use a pdf off the Internet for any critical components without checking. Real trouble lies in that.
In fact, it is good practice to collect and organize your collection of manuals in a central location. Having a copy of pertinent manuals at both the studio and the transmitter site is a good idea.
If you have only one copy of a manual, make another, even if it is a scanned pdf, for checking on parts when you are at another location. Some engineers carry with them a CD or DVD of all the manuals they use. It has saved many a long drive at a difficult time.
Know What You Want to Do
Before putting your hands inside any gear, make sure you know what you intend to accomplish.
You should do some research – a quick Google check will often suffice – for a thorough list of known failures or any upgrades/changes to the gear from those who use it. Do not assume that you, as the engineer and not the user, can pick up on all potential failures without input.
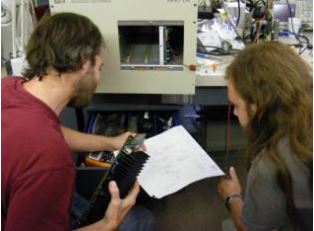
Again: listen. No one’s memory is perfect. Document the user’s comments, their wants and needs, so you can refer to them later and be sure that you have indeed made a complete repair.
The Organized Bench
As you proceed, be organized. The worst thing you can have happen is inadvertently hitting a pile of parts on the bench, causing them to suddenly fly in all directions.
Some hardware is easy to find locally if lost, but much is not. You do not want to be scrounging for some tiny screw or specialty washer when the repair is done.
We buy ziplock bags by the dozen, and we “tag and bag” all hardware re-moved from the gear we work on – and tape the bags to the gear so they do not get lost.
Also, since we work on lots of gear, we carefully label each cover, so we do not get covers mixed up.
One Step At a Time
As you work on equipment, do be thorough and methodical.
When we get a new piece of gear in to work on, one of our technicians notes any missing hardware, whether the unit has a power cord (especially a strange one), or other existing visible damage to the gear. We never want to be blamed for having lost items that we never got in the first place.
This might not be so much of a concern to an engineer who only works for one station or cluster, but there is never a reason not to be thorough and careful.
Take a Good Look
Keep your eyes open.
Once we note any discrepancies and then take the covers off, a technician goes over the unit carefully and notes any obvious failures, burned parts, broken wires, loose or missing internal hardware, etc.
We start by looking for discolored or cracked resistors and capacitors, blown fuses, shattered plastic power transistor cases, or melted insulation.
Many problems can be addressed just by repairing or replacing the obviously dead stuff.
If you do not have a small digital camera, use that cellphone or iPad and take pictures of the unit. Focus on any items that do not look right, as well as where all the wires and parts go. This will help you in reassembling the unit later.
Use the Right Diagnostic Tools
A good repair starts with good test gear.
You are only as good as your test gear, so I recommend that you do not scrimp here. I may dress very casually, but I am an admitted brand snob with test gear: I am a huge fan of Tektronix, HP/Agilent, and Fluke, among a select few.
Many times just a good DVM and scope will be sufficient to diagnose a problem and allow for a competent repair. One of the tricks is in knowing when to stick with the basics and when to call in the big guns of specialty test gear.
The first piece of gear you will need on a broadcast gear bench is a good digital multimeter. The features most needed are a diode check function and true RMS capability for AC measurements. Beep functions for continuity or diode testing are handy too – if you do not have to look at the meter to know what it is trying to tell you, that is a plus.
The next thing you should have on the bench is a good oscilloscope. As I often say, the scope tells the tale – it will allow a good tech to find subtle AC and transient-related problems that can be easily missed when using only a multimeter. (Just as this was written, a scope allowed us to locate a problem IC in a dead exciter where the DC voltages all looked fine.)
Of course there are many other useful pieces of gear, such as a capacitor checker or LCR (L for inductance//C for capacitance/R for resistance) meter, network and spectrum analyzers, sweep generators, RF and audio signal generators, distortion analyzers, service monitors, and many more.
There even are some small semiconductor testers that now will identify and characterize just about any transistor, FET, diode, or thyristor (SCR or triac). These units are quite inexpensive and compact, too.
Next time, we will talk about some basics – and some tricks – for using a multimeter in troubleshooting. Then, on to the same for a scope.
– – –
Michael Patton is an industry veteran known for tackling hard-to-repair gear. He is President of Michael Patton and Associates in Baton Rouge, LA. You can contact him at: mike@michaelpatton.com