

Give Me a Sign – A Durable Sign!

[August 2014] Every broadcast station must post information signs of one sort or another, ranging from the Antenna Structure Registration Number to RF Radiation warning signs to contact information. Of course, the signs then must be maintained. And that sometimes generates an idea or two.
If you have ever managed a broadcast transmitter site, among the various requirements you had meet were those to mount various combinations of “Red” “Yellow” or Blue” notice signs – or keep them in repair as part of your Radio Frequency Radiation (RFR) compliance burden.
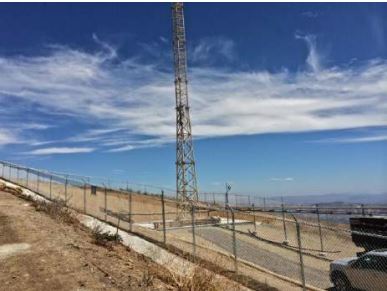
A site ready for RFR sign installation
We have all seen what happens to RFR fence-mounted signs over the years, especially at sites where winds approach or surpass gale level speeds. Even without vandalism, the signs deteriorate far too rapidly, increasing maintenance costs.
Over the years, I have experimented with one aspect of RFR compliance, namely devising a reliable mounting arrangement for RFR signs placed on chain link fences.
The Mechanical Problem
Like many engineers, I have in the past used a safety wire tool and a roll of stainless steel wire.
The RFR signs we buy are made of thin metal. If you tighten the wire to the point that the sign is secure, you also will have tightened it enough

Safety wire installation tool rejected for this project
so either the inevitable small movements of the sign and/or the stress of the safety wire passing through corner holes will eventually cause the RFR sign equivalent of Janet Jackson’s infamous Super Bowl wardrobe failure.
Recently, after ordering more than twenty (20) 12 inch by 18 inch RFR signs in two languages for the fence at a brand new FM site, I vowed to come up with a better long-term solution.
A Solution For the Long Term
At first, I tried building the sign frames out of heavy zinc-coated perforated angle stock and flat stock.
That worked great, but doing this for 20 large RFR signs brought up another problem – the cost of each frame had approached the cost of each sign itself. It was time to go back to the drawing board – or rather the aisles of my local hardware store where I took advantage of one of our biggest engineering secrets: I started looking at hardware until I found a solution.
The solution finally presented itself in the form of metal strips usually used to work with light-weight shelf brackets. They appeared to me in my hardware aisle vision in six-foot lengths that could be chopped up into 12 inch sections to backstop the top and bottom of each sign.
The cost for the two strips for each sign came out to $0.64. (The zinc-plated ¼ x 20 bolts, washers, lock washers, and nuts obviously cost my client somewhat more than the strips, but that was unavoidable.)
Pre-Installation Preparation
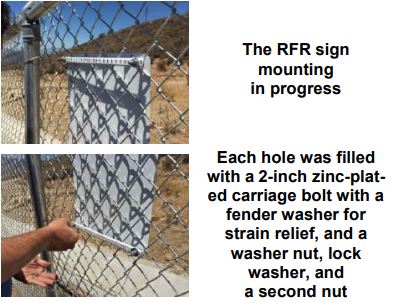
I decided to secure each corner of each sign with a 2-inch zinc-plated carriage bolt with a fender washer for strain relief, and a washer nut, lock washer and another nut to make sure nothing comes loose.
The first step was to take a zinc pilaster shelf bracket strip, cut it into 12 inch sections, and drill out holes to match the top and bottom holes on the signs.
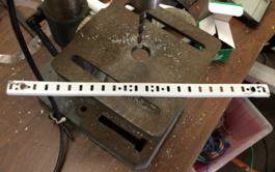
Using a drill press, the task went pretty fast and easily.
Before finishing up, we made sure we had the correct number of parts (plus a few spares, just in case we dropped something in the dirt on site) and that they would all fit together properly.
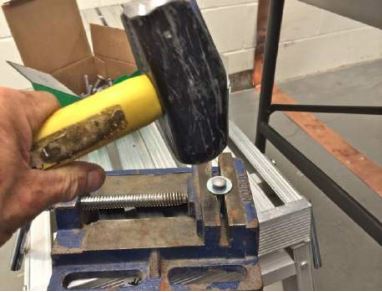
Adapting ¼ inch x 20 carriage bolts
to accept ¼ inch fender washers
In the end, it only took few minutes to prepare each bracket for installation on the fence, and we were ready to pack out to the site.
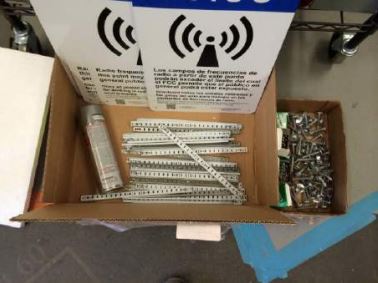
Signs, precut and pre-drilled zinc pilaster strips, and some of the zinc hardware, ready for installation
Installing on the Fence
Once on site, it was a simple matter to securely mount the signs at strategic places.
Why did we not just use a washer, lock washer, and one nut?
I knew that tightening a single nut down on a lock washer would deform the sign and bracket, so the first nut was tightened enough to prevent each sign corner from moving, and the second nut and lock washer brought down so the first nut cannot easily loosen.
To finish the job, all the hardware on the back of each sign got a coat of spray cold galvanized paint.
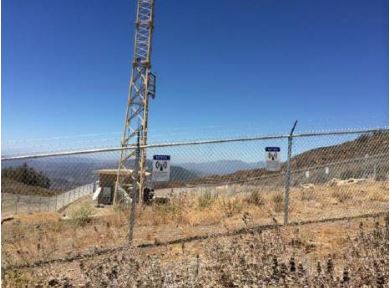
Two of the signs mounted (hopefully) for years to come
I believe the RFR signs on this fence will hold up quite well over time using this mounting arrangement. Maybe you will find it useful too.
– – –
A broadcast engineer with extensive experience from small to major markets, Richard Rudman is a regular contributor to The BDR and is the owner of Remote Possibilities in Santa Paula, CA. Contact him at rar01@mac.com